Braided brake lines are one of the most popular modifications people make to their bikes – replacing the original rubber lines is often thought to give your bike better, sharper brakes as well as improving the looks.
Of course, many new motorcycles now come with braided lines already fitted, but if you’re changing your bike’s hoses – whether to simply look better, for a custom build or to improve performance – it’s important to know what you’re buying. Nothing is more important on a motorcycle than the brakes!
Based in Dorking since 1970 when Chris Ventress started making cables for his competition bikes, he and Colin Hill ended up running one of the country’s leading manufacturers of brake hoses and control cables. Every year, Venhill assembles over 20km of brake hoses and 100km of cables. We asked MD Max Adams, engineer and MD of Venhill since 2000, everything we ever wanted to know about braided brake lines…
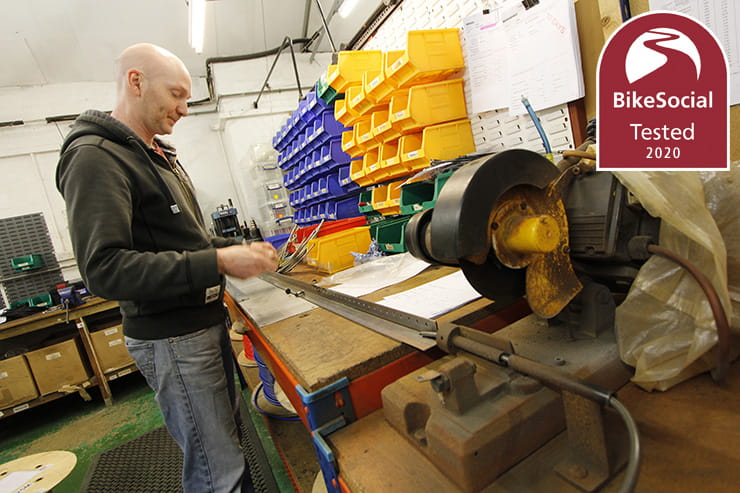
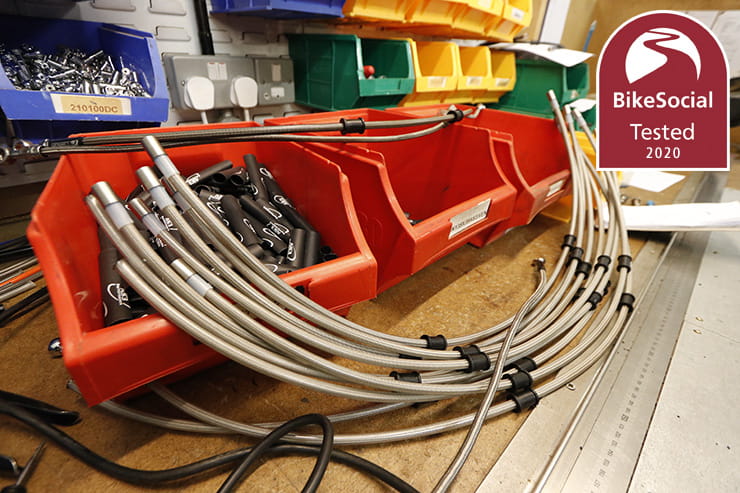
John from Venhill in Dorking assembles a new set of brake lines for a customer – turnaround is just 48 hours for web orders
Are braided brake lines better than OE rubber hoses?
The benefit of braided lines is the durability; over time rubber brake lines become soft so, as they expand under pressure, you lose some of the force that’s applied to the brake pistons; your brakes end up feeling a little spongy and slower to respond.
There’s no real advantage to putting braided lines on a brand new bike that has rubber lines – it’s as they start to wear over time that the difference will be felt. Decent braided lines should last indefinitely, so once you’ve changed them, you can pretty much forget about them
Do braided brake lines give you sharper brakes?
Compared to a set of old rubber hoses, braided lines should give a noticeable improvement in braking force. But on a brand-new bike, the ‘feel’ of the brakes is far more dictated by the design of the calipers, the pad material and the ratio between the size of the master cylinder and the brake calipers’ pistons.
If your braking system’s master cylinder is larger than what we’ll call the ‘optimal’ size to the pistons (or slave cylinder), there’ll be very little movement, so less modulation. That means there’ll be little movement in the lever but you have to put more force into it.
If the master cylinder was smaller than that optimum, you’d have more movement on the lever, but you’d have to apply slightly less force (because work is force times distance). If you jump on a new bike that’s got a slightly smaller master cylinder than you’re used to, you might feel that the brakes are a bit soft due to the travel of the lever, but changing the hoses isn’t going to make a difference.
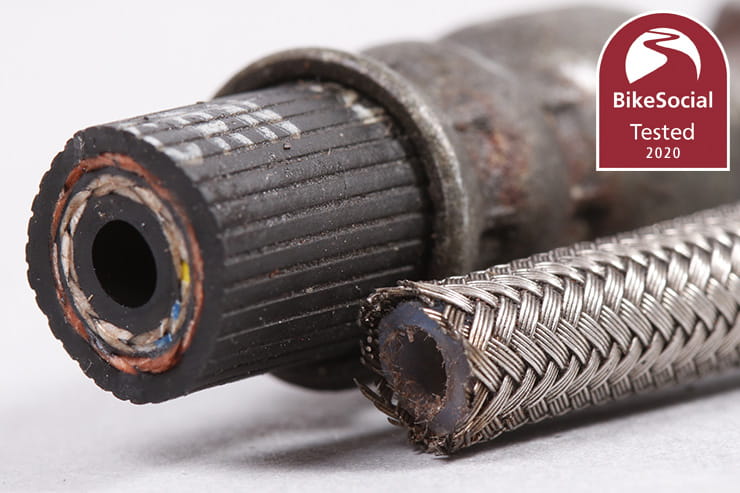
Rubber hoses have an aramid fibre braid inside, as can be seen from this old Kawasaki brake line. The braided line shown here is an equally old part from a time before PVC coatings that protected your bike’s paintwork. You can clearly see the similar-sized bores though, and the simpler construction of the braided line
What’s the difference between quality braided lines and cheap ones?
It’s important that brake lines have a PTFE (or Teflon) liner – lower-quality hoses might have nylon liners, which can – in extreme circumstances – melt, leading to a catastrophic loss of brakes.
Venhill fitted brake lines to some race go-karts after they were suffering brake failure with the braided lines that had been fitted previously. The racers dragged the brakes causing the discs to get extremely hot and that heat was transferred to the caliper, which tracked through the banjo and into the nylon at the caliper end of the hose, causing it to melt and fail. That’s an extreme example and unlikely to be seen on a motorcycle, but there’s also the risk of the hose pressing on the exhaust manifold…
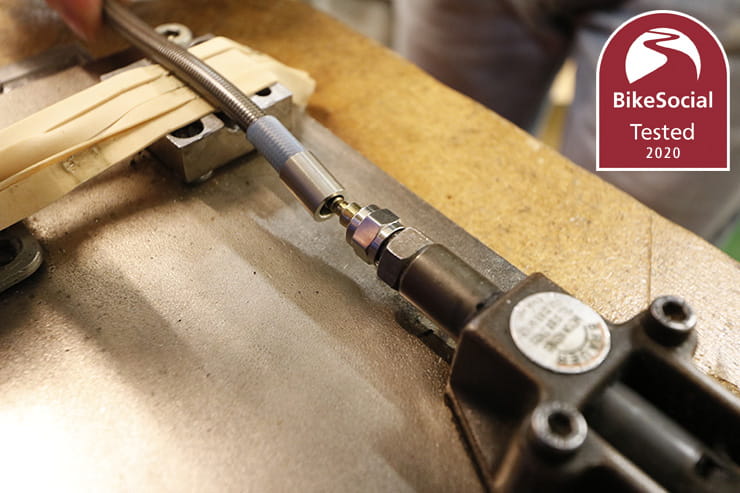
Venhill’s Powerhose Plus lines are made with a rotating nut crimped to each end, which allows the banjos to be perfectly positioned as the lines are fitted to the bike.
The brake lines must have been properly assembled too – every joint is a potential failure point – but there’s also the risk of a tiny hole in the hose itself. When made, the hose comes out of a huge extruder before being braided then wrapped onto a drum. With good suppliers it’s rare, but it can happen that a tiny imperfection creates a weak point in the hose. The leading manufacturers will test every line after it’s made – Venhill tests each assembly to 1,500psi before it leaves the workshop (on a motorcycle, a brake line is really only ever going to need to endure a maximum of around 300psi under very hard braking). Once a month the company also does a batch test of hose samples to 10,000psi, to ensure it’s of the very highest standard.
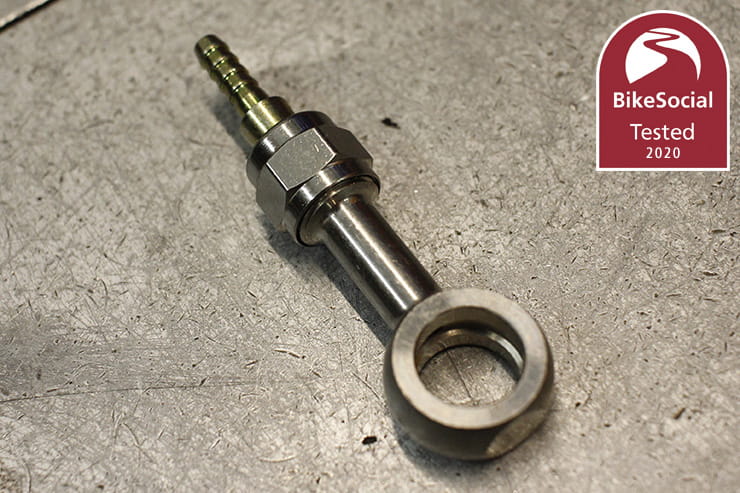
Venhill makes its brake lines with rotatable banjos; the design means that the hoses can be positioned exactly as you want them, with no twists, then easily locked down in final assembly before bleeding them. If the banjos are locked in one position during manufacture – for instance by crimping them on – it’s very hard to make sure they’re going to sit properly on the bike (which could be a problem, near the exhaust for instance). This is also helpful on custom bikes and means that the banjos can be changed at any time, for instance if you modify the bars or change the master-cylinder or calipers.
Braided lines often now come with a PVC coating that protects your bike’s paintwork from the braid rubbing it away. Venhil’s ‘Powerhose Plus’ lines, which have the swivel-nut fastenings are all coated, though the company also offers uncoated line for complete DIY line builds that use a nut and olive (you could use coated lines, but you’d have to cut the PVC back before assembly).
If in doubt, look for brake lines that meet or exceed the requirements of DOT and TÜV – the leading UK manufactures all do.
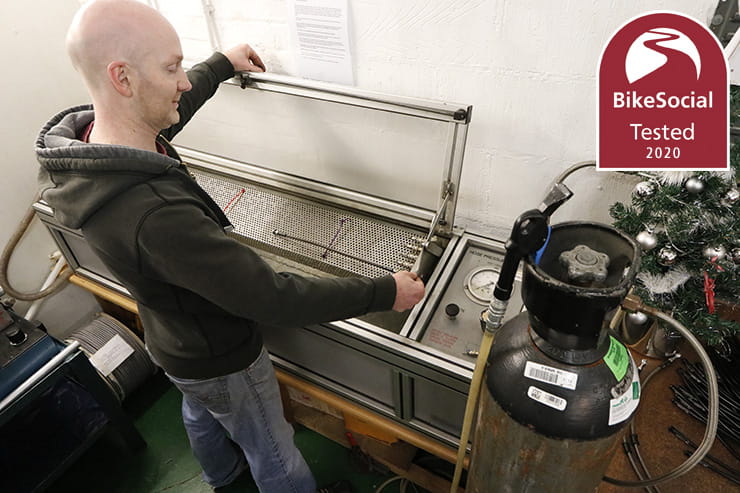
Venhill pressure tests every line it makes before dispatch
Why should I change my brake lines for braided?
If the original hoses are tired, worn or damaged they should be replaced. Many manufacturers recommend the replacement of brake lines over time; in some instances, as early as four years. But they’re also a common cosmetic modification, swapping for traditional silver lines or a choice of colours. Venhill’s lines are made to accept a range of fittings; stainless steel, chrome, black chrome and titanium in a variety of angles, so as well as replacing existing parts, they’re popular with custom bike builders.
How long do steel braided brake lines last?
Assuming they’re not undergoing undue stress due to the steering or suspension, or through a poor, twisted layout, good quality braided motorcycle brake lines should last the lifetime of the motorcycle: they won’t deteriorate like a rubber hose, but they must still be checked frequently for any signs of wear or damage. Also beware of older bikes that might have braided lines but haven’t had regular fluid changes, resulting in moisture building up inside the system.
It’s worth keeping an eye on how your brakes feel too – a soft or spongy action is most likely due to contaminated fluid, but it could be the result of hose damage.
Equally, brake drag is usually caused by corrosion behind the caliper piston seals, but it could be a restriction in the brake lines.
Intermittent problems could be caused by internal hose damage that can’t be seen; ultimately, the brakes are vitally important, and replacing the hoses is a relatively inexpensive process.
What’s the best brake-line layout for a motorcycle?
ABS-equipped bikes – especially those with linked systems – will likely have a more elaborate hose layout as the front and rear lines go into the bike to the pump, before coming back out to the calipers, but pre-ABS bikes typically have one line on the back brake (assuming they’re not linked), and one of three layouts on the front if there are two calipers:
• One line from the master cylinder to a splitter that has a line going to each caliper (‘tee’, or ‘standard’)
• One line to one caliper, with another line going over the mudguard to the other caliper (‘cross-over’ or ‘hop-over’)
• Two lines going straight from the master cylinder to each caliper (often called the ‘race layout’).
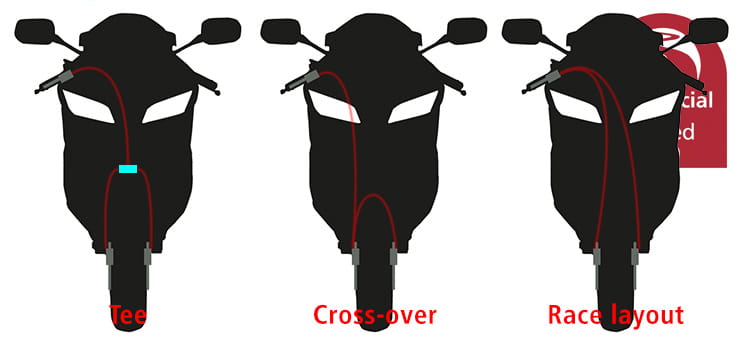
While the latter two set-ups will use fewer joints, which means fewer potential failure points and a cheaper kit due to fewer fittings, they won’t feel any different; the race set-up isn’t a ‘better’ system, it’s simply the way the lines should be routed to meet the safety requirements of the ACU Road Racing Standing Regulations: ‘14.22 BRAKES: For machines fitted with two front disc brakes, a split of the front brake lines for both front brake calipers must be made at or above the lower fork yoke.’
How do I know what length of brake lines to buy?
Venhill has a huge catalogue of fittings for standard bikes, but it only takes raising the bars for instance to need a slightly different brake line, whether it’s the length or the angle of the fittings. You should measure your brake lines with the wheel off the ground, so the suspension is at full extension. It’s important of course to check that the hose won’t catch in anything or foul, and be guided by your hose supplier on how to measure them.
Be aware that the banjo bolts used in the brake calipers will vary significantly. As a guide, here’s what you’re likely to find, but do check;
|
Suzuki and most European machines
|
M10x1mm fine and/or M10x1.25mm coarse thread
|
|
Honda, Yamaha, Kawasaki, Triumph
|
M10x1.25mm
|
|
Early Triumph & Norton
|
3/8 UNF
|
|
Harley Davidson
|
7/16 24tpi and/or 3/8 UNF
|
|
BMW, Brembo & Magura
|
M10x1mm
|
|
Nissin Calipers
|
M10x1.25mm
|
What’s the best type of banjo bolt?
Venhill offers banjos in stainless steel, titanium, black chrome or traditional chrome; they and the other UK manufacturers don’t offer anodised aluminium fittings as they’d not be a good idea with the salt on our roads.
As long as a high-quality chrome is used on the non-stainless banjos, corrosion shouldn’t be an issue, but like anything on your bike, you should keep them clean.
Can I fit new brake lines to bikes with ABS?
When ABS was first introduced on bikes, the hoses were sometimes crimped directly to the ABS module, which meant the entire module had to be replaced. That’s usually not the case anymore, so you can typically replace worn or damaged lines, though where you might have had a total of three brake lines on an older bike, with ABS you could have as many as seven, so the cost will be higher.
While Venhill has had no problems replacing brake lines on ABS-equipped bikes, some manufacturers recommend the system is primed using a diagnostics tool, so check with your dealer if in any doubt.
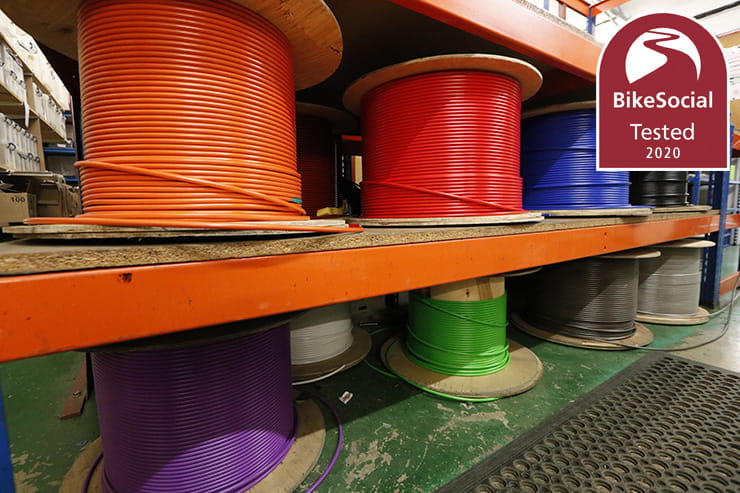
Brake lines are available in a variety of colours – these are just some that Venhill offers
What brake fluid should I use? DOT 3, DOT 4, DOT 5 or DOT 5.1?
You should use the brake fluid that’s specified on your brake’s master-cylinder (assuming your bike has the original braking system on it).
The DOT numbers relate to the Department of Transportation minimum standards for the boiling point of the fluids…
|
Specification
|
Base
|
Dry boiling point
|
Wet boiling point
|
|
DOT 3
|
Glycol
|
Over 205°C
|
Over 140°C
|
|
DOT 4
|
Glycol
|
Over 230°C
|
Over 155°C
|
|
DOT 5.1
|
Glycol
|
Over 260°C
|
Over 180°C
|
|
DOT 5
|
Silicone
|
Over 260°C
|
Over 180°C
|
You’ll see there are two boiling points – dry and wet: the dry boiling point is when the fluid is new, while the wet is when it’s become 3.7% water by volume due to absorbing it from the atmosphere. This will happen within one or two years of normal use, or within a day or so in an open container; it’s why you must ALWAYS fill your brake system from a fresh, sealed bottle.
When braking, the energy from the friction between the brake pads and discs is converted to heat, which is transferred from the pads to the caliper pistons and on to the brake fluid. If the fluid boils, small bubbles of gas are formed that will make the brakes soften to the point that they can fade to nothing. Bad times.
Most quality brake fluids will exceed these minimum boiling points, and for almost all riders the only thing to consider is what the recommended fluid for your bike is.
DOT 5 is not to be confused with DOT 5.1 – while DOT 3, 4 and (confusingly) 5.1 are all glycol ethylene-based, DOT 5 is silicone-based and must not be used in a system designed for glycol fluids. If your bike has a hydraulic clutch, there might also be a requirement for mineral oil; again, DO NOT mix fluids between the systems, and ALWAYS use exactly what is specified as the wrong fluid can cause problems with some seals; over time the braking system could degrade and, ultimately, fail. As with so many things, don’t trust a forum… if you don’t have access to the bike’s owner’s manual or a Haynes manual, check with the dealer.
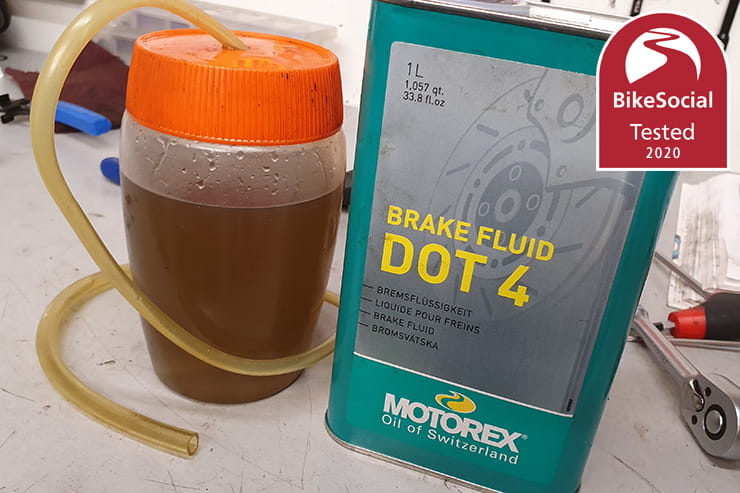
In the bottle is fluid that’s several years old, drained from an old Kawasaki. Always make sure you replace it with new, good-quality fluid to ensure your brakes are safe
Is DOT 5 brake fluid the best I can buy for my motorcycle?
No. DOT 5 is a silicone-based brake fluid; it won’t damage your paintwork like glycol fluids can if spilt, and it’s not hygroscopic, which means it won’t absorb water over time like glycol. But it’s more compressible so can result in a more spongy feel to the lever; it’s also not designed for racing use.
Glycol-ethylene brake fluids are designed to lubricate the rubber parts inside your brake system, which is why it’s important to use it – unless a silicone-based DOT 5 is specified, for instance on some Harley-Davidsons and Buells between around 1976 and 2004/2005 (pre-ABS).
DOT 5.1 is more often required now, but not necessarily due to its higher boiling point – the specification also dictates the viscosity and DOT 5.1 is more consistent at lower temperatures in ABS systems, so for a global market it can make sense. The problem is that it’s more hygroscopic than DOT 4, so regular changing is all the more important.
Once again, only use the brake fluid that is specified by the manufacturer of your bike / braking system.
How often should I change my bike’s brake fluid?
Most bikes will likely require the brake fluid to be changed every couple of years – check your owner’s manual. The point is that as the fluid is absorbing moisture, the boiling point lowers; you won’t feel a difference until you have to work the brakes hard, and then they could fade. Fast riding on back roads or track could mean you’d be wise to change the fluid every six-months to a year, while racers will be changing it before each event.
Do I have to tell my insurance company if I fit braided brake lines?
That will depend on your insurer, but at Bennetts bike insurance, braided lines are among the common modifications that you don't need to tell us about.
